Petri Net Simulator
Purpose
 |
The Petri Net Simulator allows you to process a Petri Net drawn with the FMC Stencils inside Visio.
The simulator can be used to manually or automatically step through a Petri Net. In the automatic variants, conflicts and concurrency are resolved randomly. The simulator supports capacity, arc weights and stack places (used for recursion). A history allows to step backwards.
|
Utilization
Simulation Mode
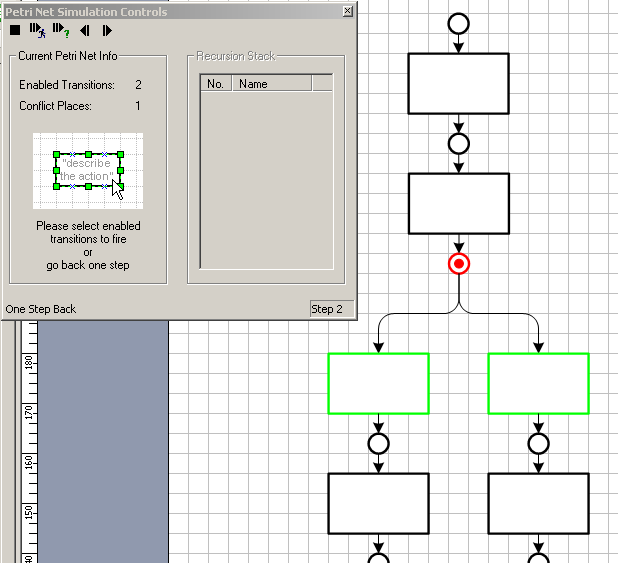
Control Dialog
 |
|
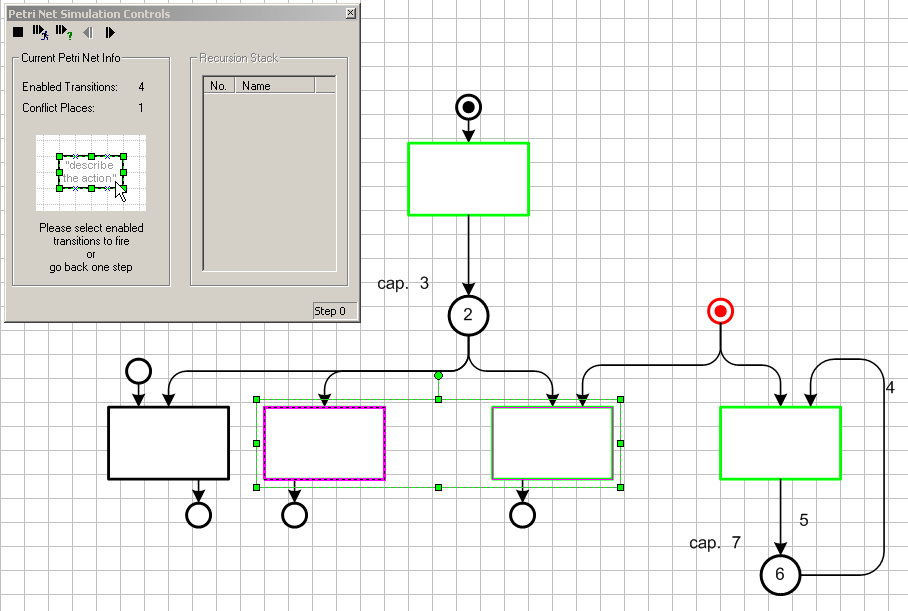
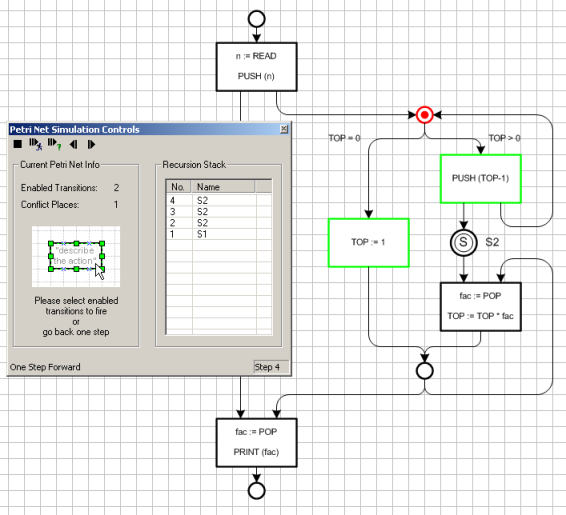
The control dialog has five buttons to control the simulation, a status information to the left, the recursion stack on the right and a statusbar at the bottom.
-
Buttons: see explanations below.
-
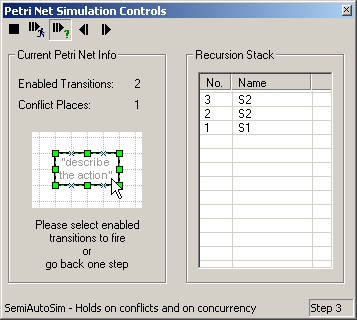
Current Petri Net Info: Shows the number of enabled transitions (green in the diagram) and the number of conflict places (red in the diagram). If you are asked to choose one or multiple transitions for the execution of the next step, you will see a hint in the status information.
-
Recursion Stack: Shows the markings on the stack, which represents all stack places. The top-most item is the one that was added most recently. The name displayed is the name of the stack place where the marking currently resides. If you have not set any descriptor for a stack place, it will get a default name.
-
Statusbar: Shows help for the current button and displays the current step number.
|
| |
|
 |
Stop: Resets the Petri Net to the initial state.
|
| |
|
 |
Auto Simulation: Automatically runs the simulation. When a conflict or concurrency occurs, it is randomly resolved. For conflicts this means that one possibility is choosen, for concurrency this means that either the enabled transitions are fired in some random order or some/all are fired simultaneously.
You can set the delay for each step in the settings (left-most button in the FMC Toolbar).
|
| |
|
 |
Semi Auto Simulation: Like Auto Simulation above, but stops on conflicts or concurrency.
If "Simultaneously fire concurrent Transitions" is turned on in the settings, concurrency is resolved automatically by simultaneously firing the transitions.
|
| |
|
 |
Back: Goes back to the last step in the history.
|
| |
|
 |
Forward: Manually fire the currently enabled or selected transitions. |
Selecting Transitions To Fire
If you are asked to choose one or multiple transitions to fire, you will see the number of currently enabled transitions (green in the diagram) and the number of conflict places (red in the diagram) in the control window. You must now select one transition by clicking on it with the mouse, and the simulator will advance to the next step.
If the situation allows for multiple transitions to fire simultaneously (due to concurrency), you can select multiple transitions with SHIFT + mouse click. To advance to the next step, you will have to click on either the Semi Auto Simulation button or the Forward button, whether you want to continue automatically or manually step-by-step.