
| Tutorial Part I: Creating a FMC Diagram with Visio |
First Step
|
This tutorial starts with a Block Diagram. Most of the properties and the behaviour of different shapes are the same across all diagram types (Block Diagram, Petri Net, E/R Diagram and Layer Diagram).
The tutorial is splitted into small steps. After each step we present the current state of the diagram. You can navigate through these steps with the "Next" and "Previous"  buttons at the top and at the bottom of the pages. At the bottom of this page you find an overview of all steps in this tutorial.
Sometimes you will find links to the Shape Reference. This section of the FMC Stencils Help explains each provided shape, including its meaning with an example, control points, context menu actions and hints.
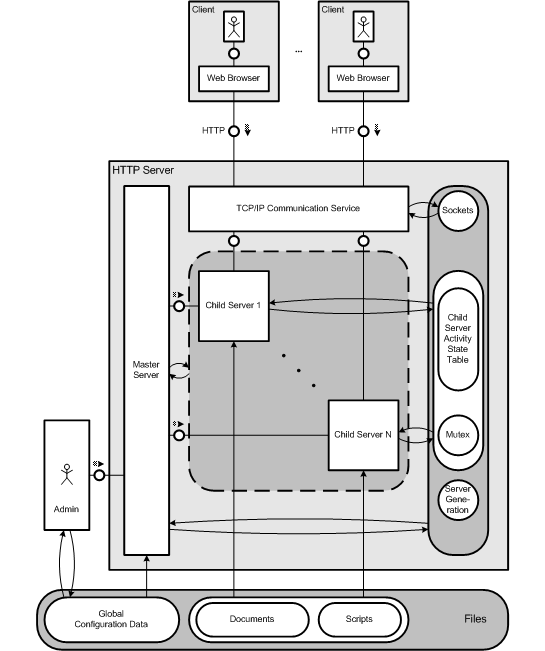
We want to draw the following FMC Block Diagram step by step with the FMC Stencils for Visio. Note that we only show this diagram in it's final version to give you an impression about what we draw, because there is no other way of representing the idea of the model depicted by the diagram. In this tutorial we will concentrate on how to draw with the FMC Stencils from the tool usage perspective. We do not talk about FMC principles or guidelines for a good layout (although the steps we undertake depend on them).
Note: Please ignore the different weights of the border lines of the shapes throughout this tutorial. The shapes originate from different versions of the FMC Stencils.
|
First Step
|